
This entry explains how to repair mySQL Database Tables using the repair table featured that is located in PHPmyAdmin. Oh and I realize the image above is a CSS file and not a database. 🙂
Getting started:
So there are a few things you will need before you get started with this. First I will assume that you already have PHPmyAdmin installed, and access to PHPmyAdmin. First create a backup of your database. You certainly will always want to do this as a repair/optimization of the database is irreversible.
Repairing the database table:
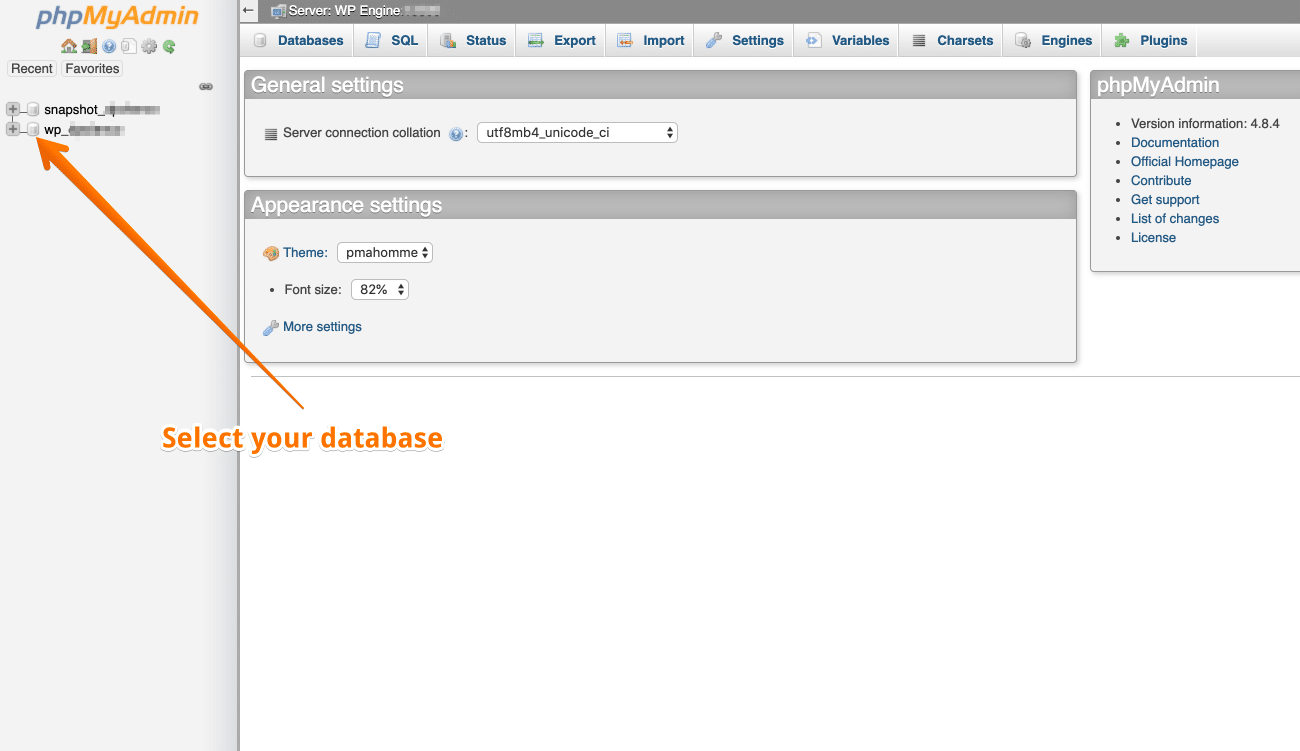
- First login to PHPmyAdmin.
- Once logged in we need to proceed with selecting our database.
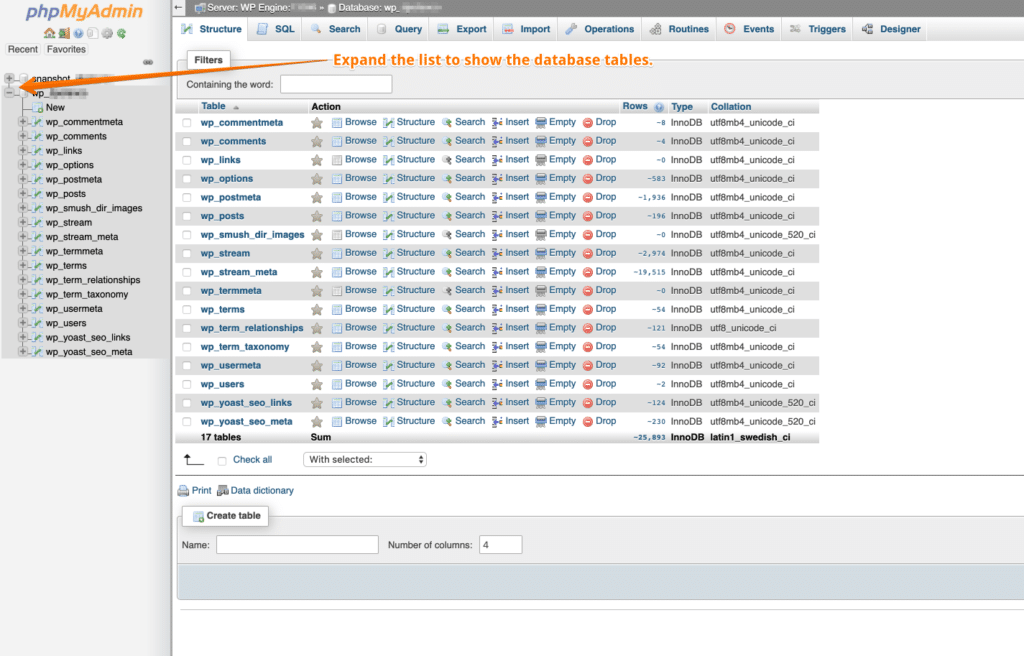
3. Now click on the + and this will display the database tables.
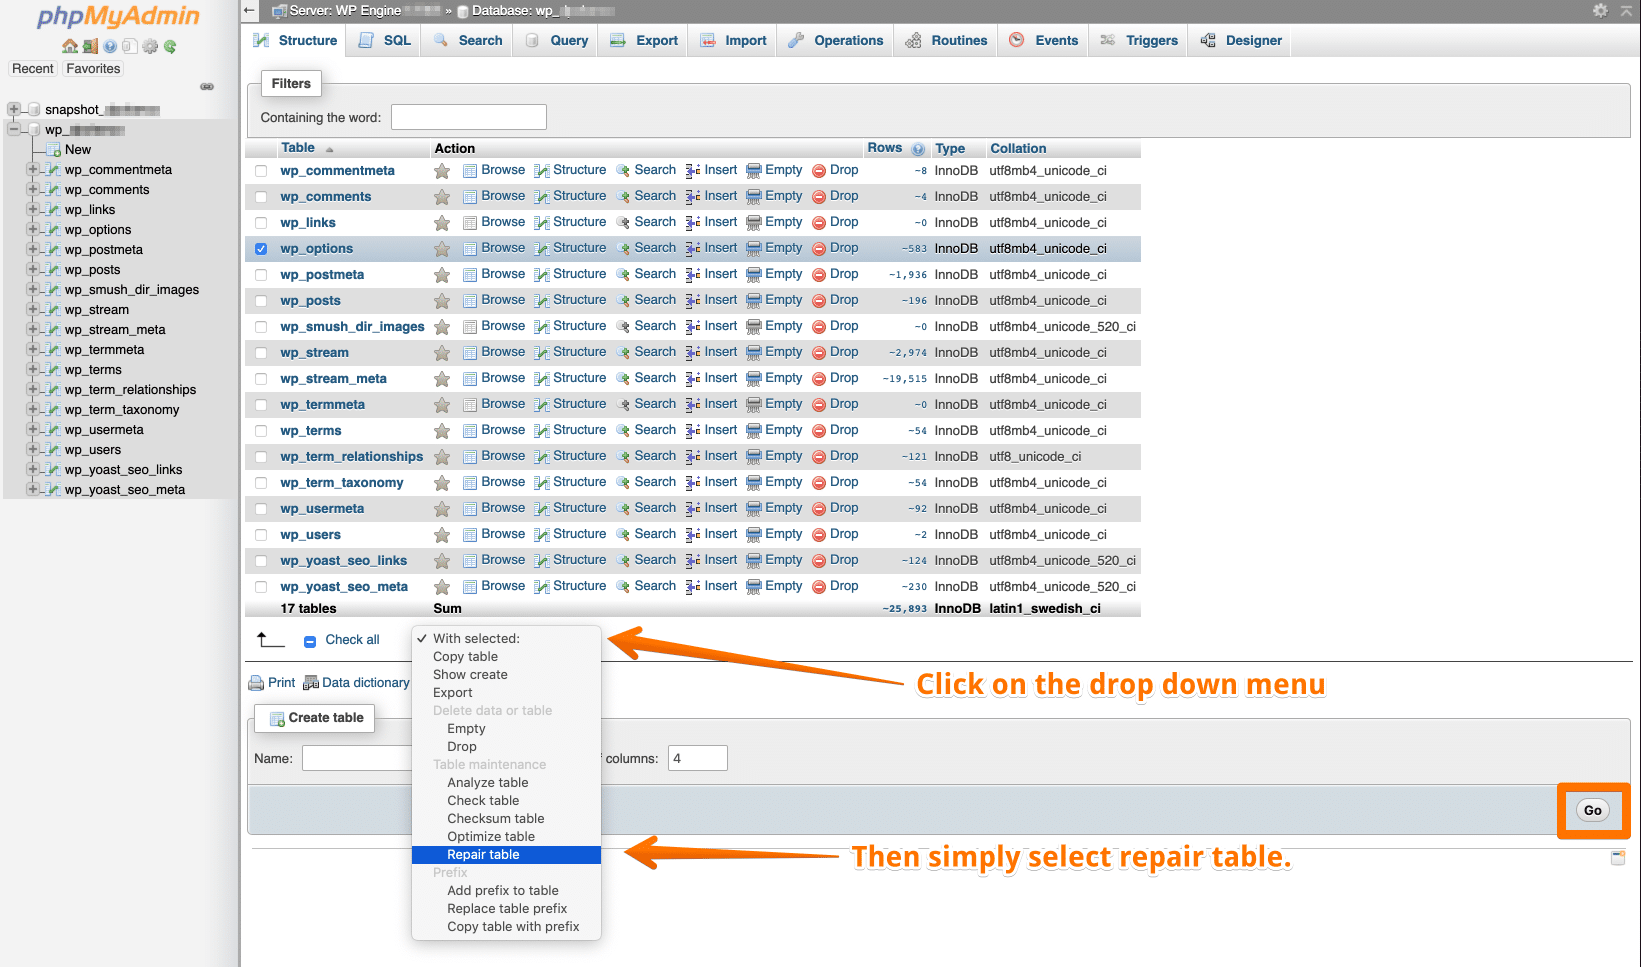
5. Next we will need to select the database table that we are interested in repairing.

4. Now that the database table is selected we will proceed with going to the drop down menu below that says “With Selected”. Then select Repair table. Then hit GO.
That’s it! The process can take a while if your database table is large so grab a cup of coffee or your favorite beverage and rest assured that PHPmyAdmin is working on repairing this table for you. If you have any questions on this top leave a comment below and I will be happy to help you out.
Leave A Comment