
Setting Up Mailgun with WordPress at WP Engine
In this entry I will give a walk through on how to install the Mailgun for WordPress Plugin on WordPress with WP Engine then how to configure it utilizing the API. Please note that in following this article you will not hold myself, WP Engine®, Mailgun© a 2016 Rackspace, US Inc. Company for any misconfiguration or issues that may occur. This walk through is to be used as is and as a reference.
Here are a few things that you will need:
- A WordPress site on WP Engine (affiliate link attached)
- The ability to manage your DNS with your Domain Registrar (eg: godaddy, google domains, domains.com)
- The Mailgun for WordPress Plugin installed on your WordPress site.
- A free account with Mailgun
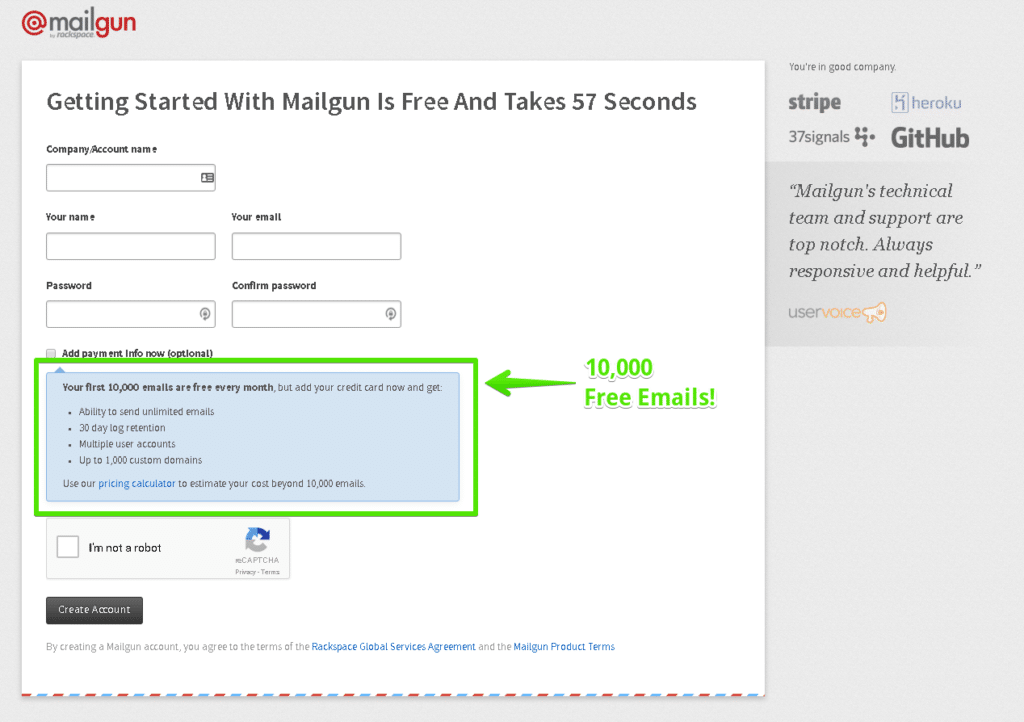
The great thing about Mailgun is that you are allowed to send 10,000 messages per month! I mean I don’t know about you but sending out 10,000 is not too shabby for a premium service like Mailgun by Rackspace. Other benefits of using a 3rd Party Email Provider such as Mailgun is that you can get some pretty awesome metrics. Some include but are not limited to:
- A great graphical user interface (GUI) with the service
- The ability to create mailing list should you be interested in this
- The ability to view all logs of how your email on when it was delivered, opened, clicked, etc.
- The reassurance that your email will be delivered and logged.
- The reporting on the service is pretty awesome as it shows all success and failures.
- Suppression management, now you can manage your bounces from your domain or any other domain configured with Mailgun
Now then, once you have all these things in front of you, you will with the following steps:
Let’s Sign up for a Mailgun Account:
Begin by heading over to Mailgun.com and clicking on Signup
You will then enter some basic information such as Account Name, Email, and password.
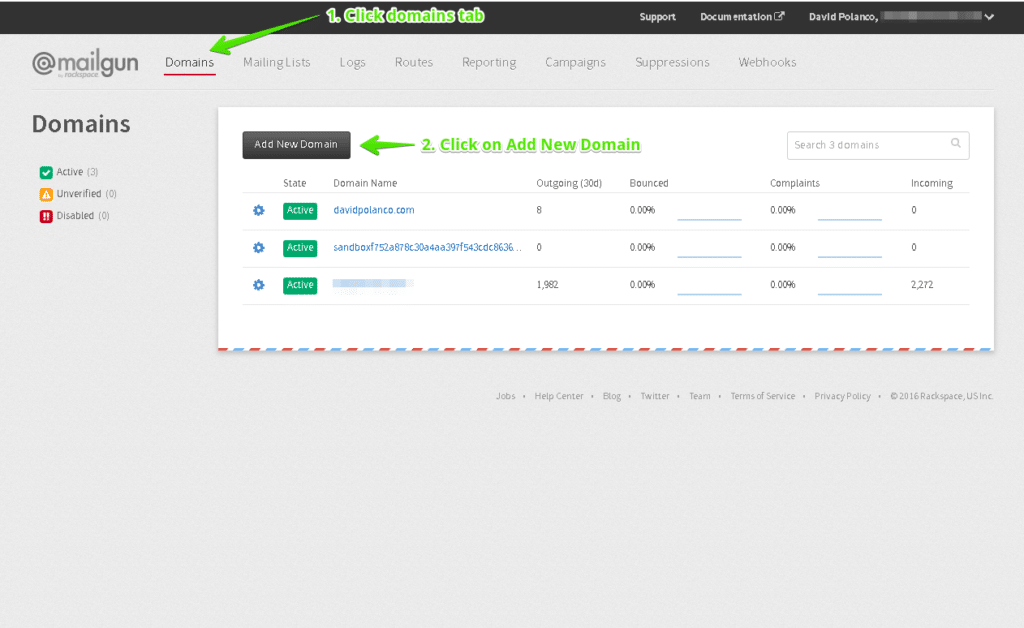
Once you have signed up proceed with going to the domains area on the top left and clicking Add New Domain
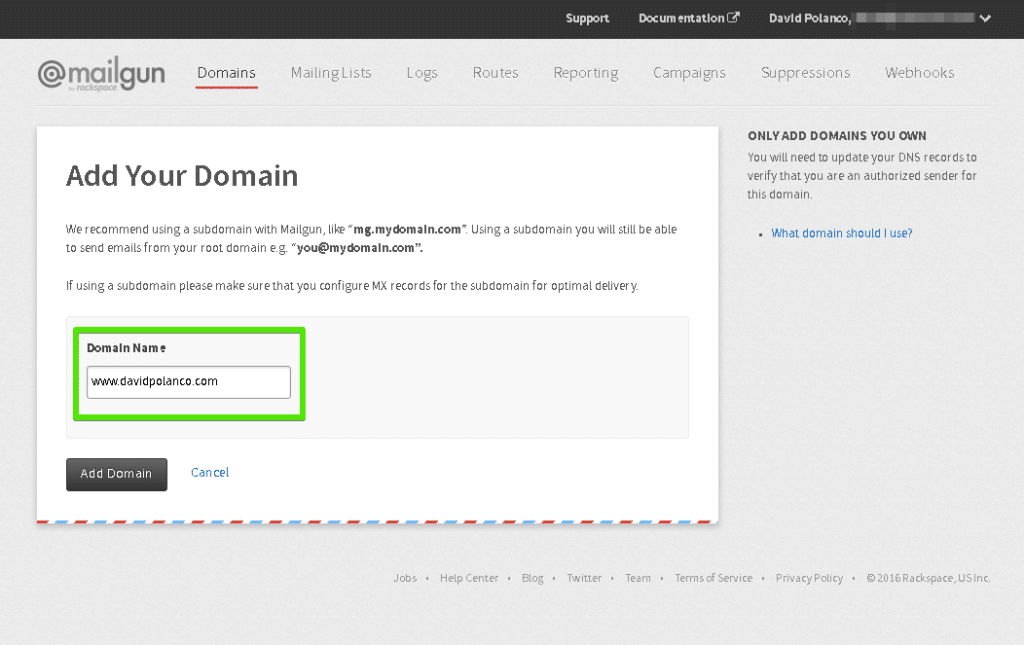
Now add your domain to this field. Mailgun recommends using a subdomain, like www.domain.com They go on to state that using a subdomain will be able to send emails from your root domain: eg “[email protected]”. So if your domain is davidpolanco.com then enter in this field www.davidpolanco.com
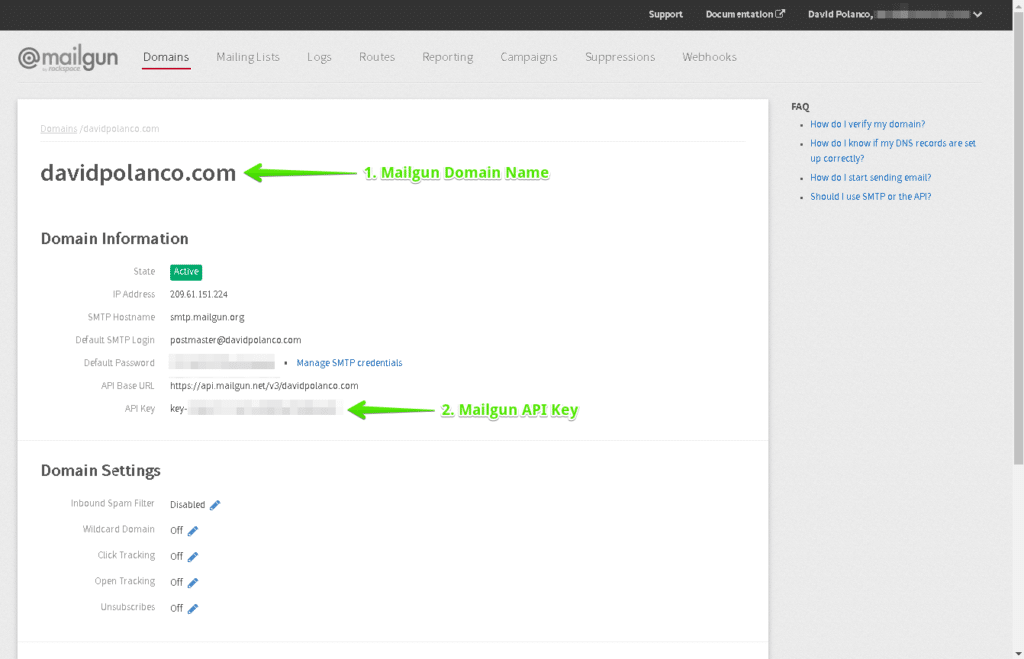
Once you have added your domain (which may take a few minutes) you will be taken to a page like this. (Which can be found in in Domains link in the header of Mailgun.)
Domain Validation and DNS Setup:
Now then, the “fun” stuff. You will be required to login to your domain registrar (GoDaddy, Domains.com, NetworkSolutions, NameCheap) This is basically the place where you registered your domains or manage your nameservers. If you mange your own NameServers than simply proceed with the steps below in your own interface. In the example below I will be providing screenshots on how to setup Mailgun utilizing CloudFlare’s DNS Management Area I have also included screenshots to walk you through these steps.
Once logged into your domain registrar if you do not know who your domain registrar is take a look at DomainTools Whois Lookup tool, then proceed to something called DNS or Manage DNS/Sites. These names do very from site to site however if you have any issues reach out to your domain name provider.
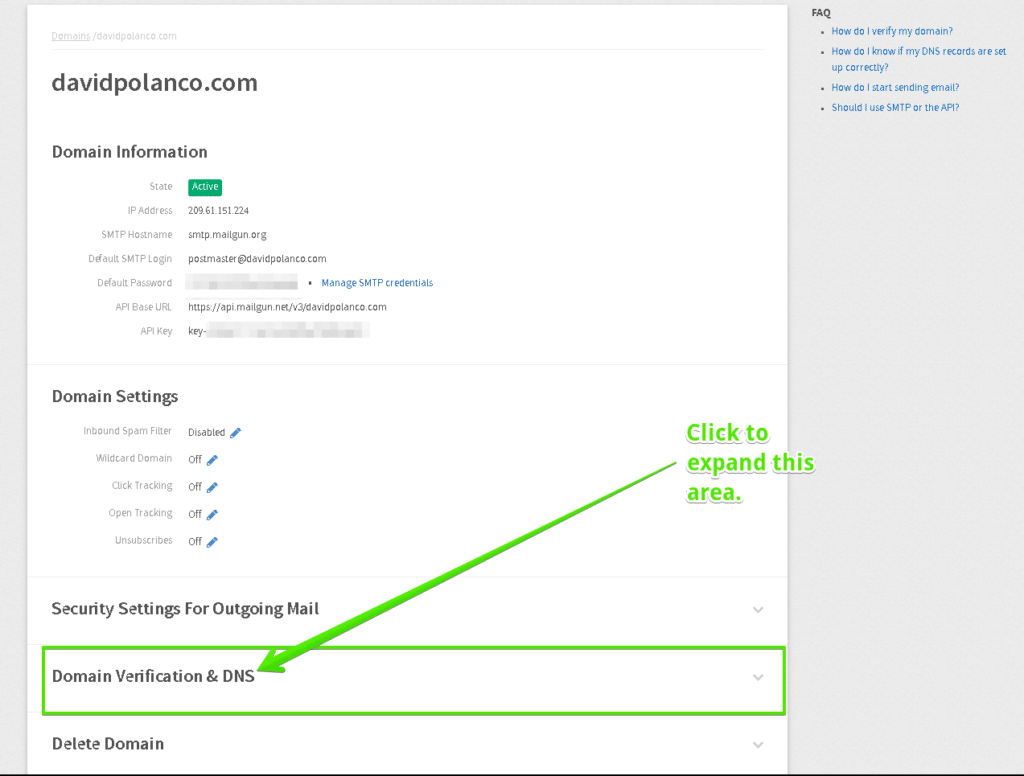
Now then back inside of Mailgun if we scroll down the domains page as shown in the screenshot above there area a few more areas that we need to fill out to validate our domain with Mailgun. This will ensure that we are who we say we are, and will verify that we own our domain.
The screenshot below is a side by side comparison with the expanded screenshot above along with my DNS Manager at CloudFlare. The easiest way to walk you through this is to simply do a side by side to illustration. Everything that we are doing moving forward is inputting Mailgun’s DNS (CNAME, MX, & TXT) into your domain manager . Keep in mind that many Domain Registrar providers can help you location this section so don’t hesitate to give them a call.
.
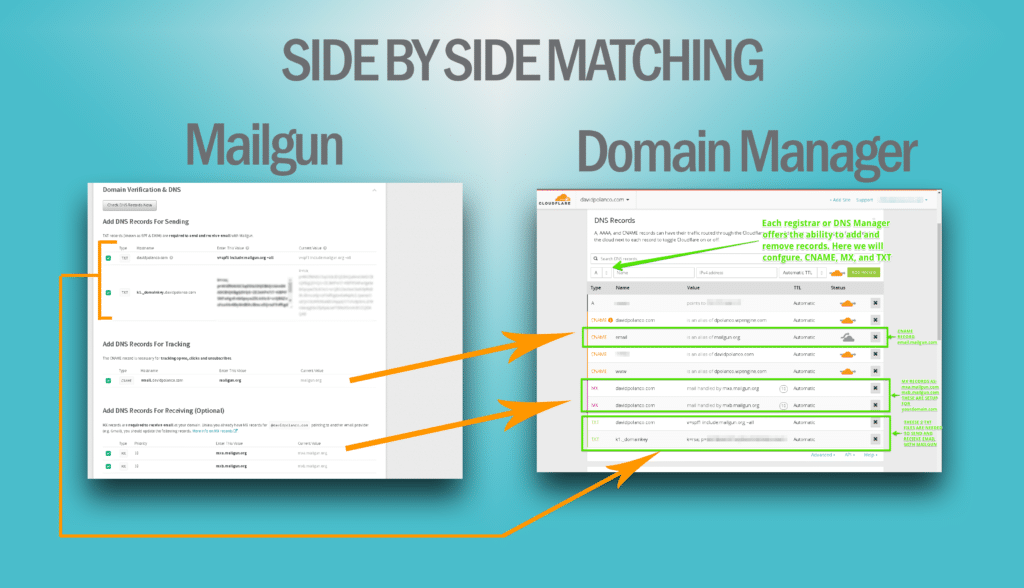
Click here to enlarge the image above.
.
Once all this information has been copy and pasted from Mailgun to your Domain Manager (DNS). Proceed with committing these changes by saving them in your DNS Management tool. Be sure you verify that everything is correct, you don’t want to make a mistake and have to go back to make changes.
Keep in mind that propagation of all these settings needs to take a place. Propagation simply put is the amount of time for changes like DNS to be registered through out the worlds Authoritative Name Servers and ISP’s. This can take anywhere from 15 mins (for your area) to 1 – 24 hours. However what is important to recognize here is we need Mailgun to verify these settings. (because that is what really matters) so we must now validate our settings.
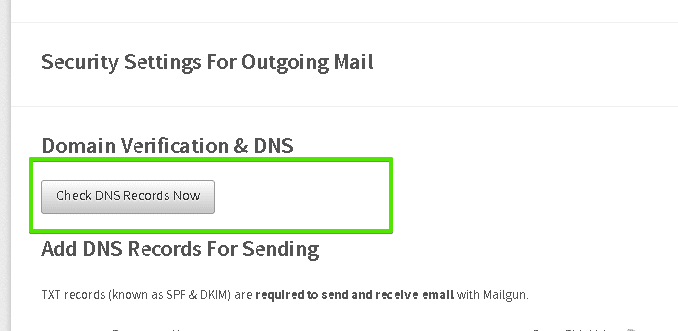
VALIDATION OF SETTINGS – Once you believe enough time has passed proceed with hitting the CHECK DNS RECORDS NOW button inside of Mailgun. See the illustration below:
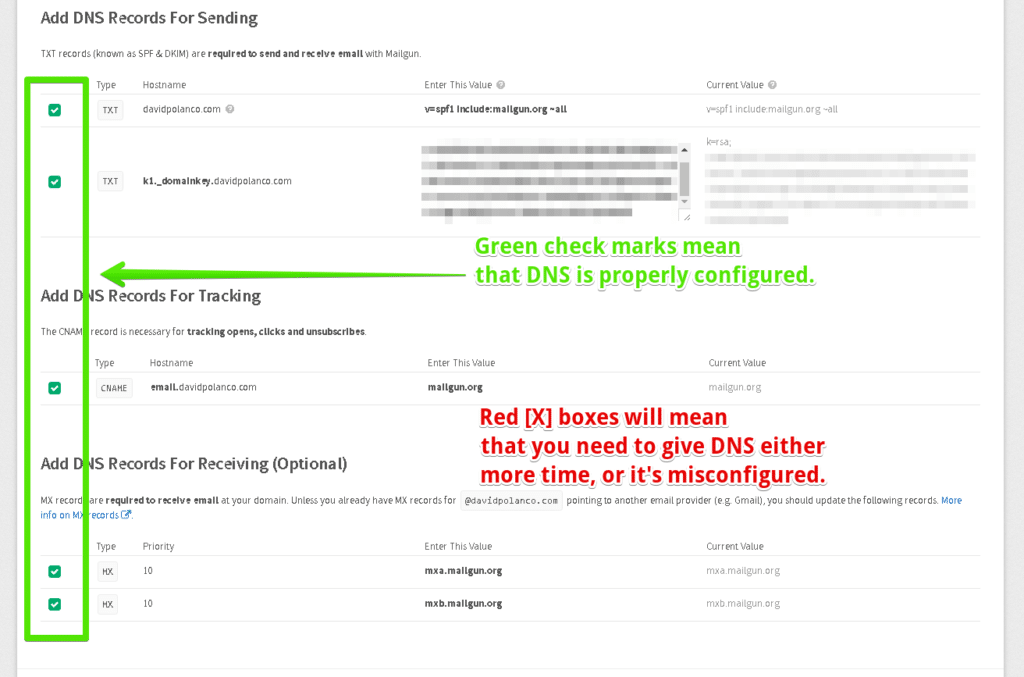
If everything checks out you will get a bunch of green icons like the screenshot below. However if you do see red [x] boxes this means that you will need to give DNS either more time, or that it’s misconfigured. If you have red [x] boxes simply verify your settings against mine. The side by side illustration located here is going to be your best friend.
Installing the Mailgun Plugin and API Key:
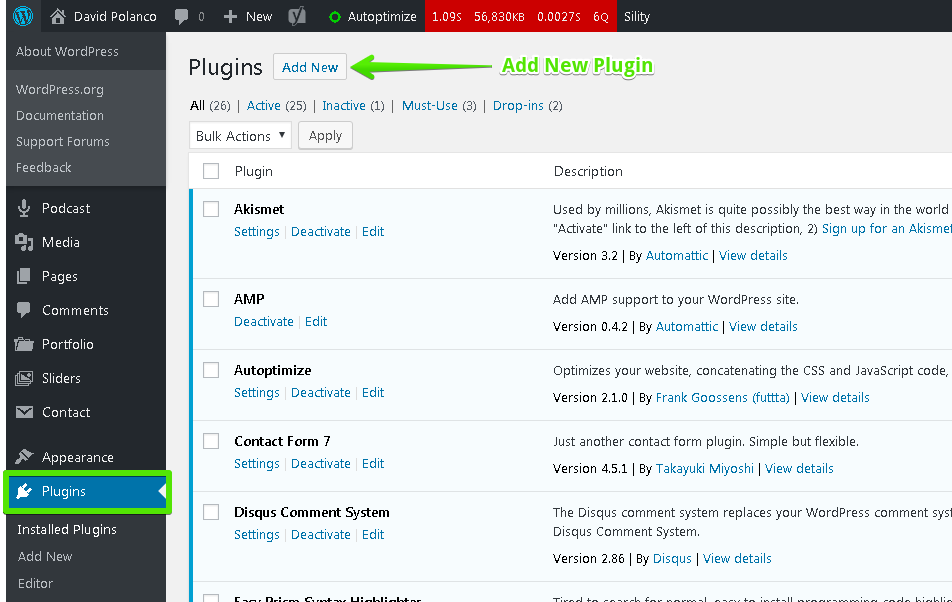
Install the Mailgun for WordPress Plugin.
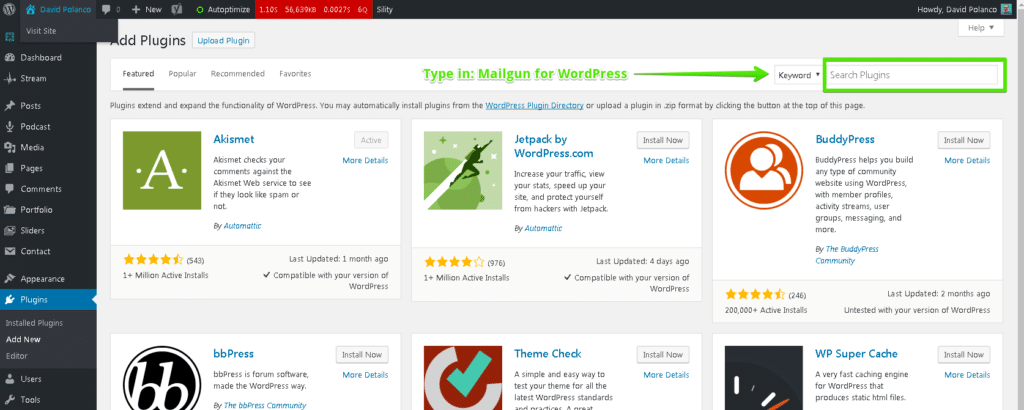
Now type in Mailgun for WordPress into the Search Plugin box as illustrated below.
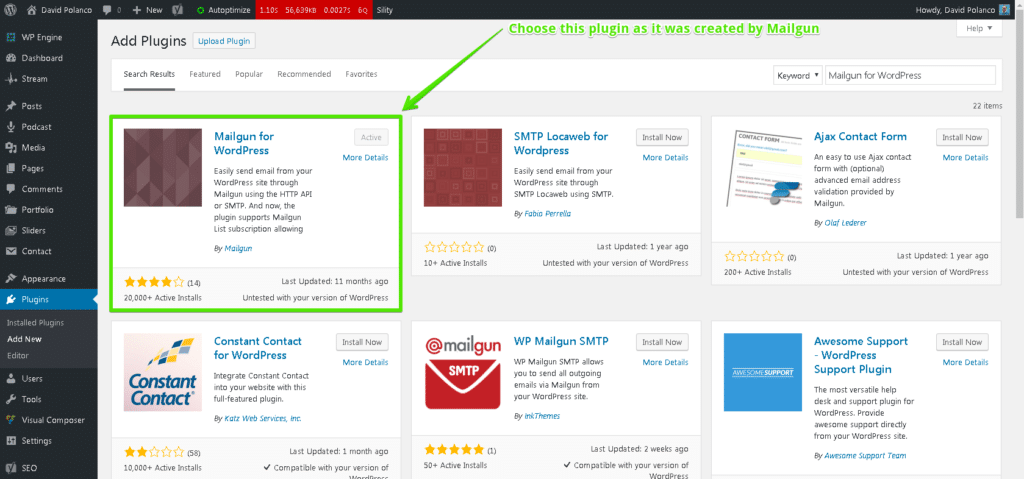
Once that is done, install and activate Mailgun for WordPress keep in mind to ensure it’s created by Mailgun.
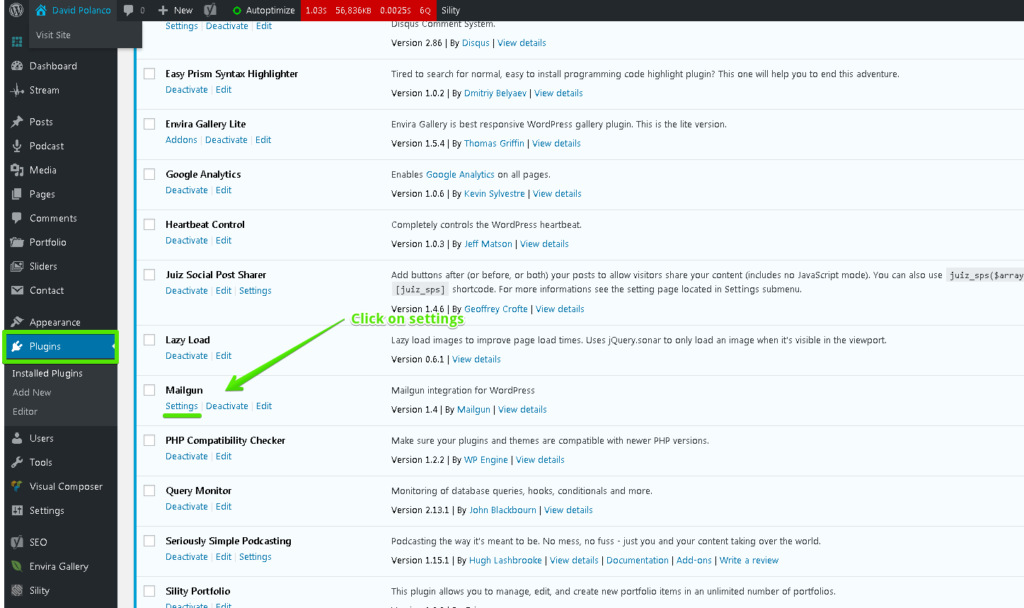
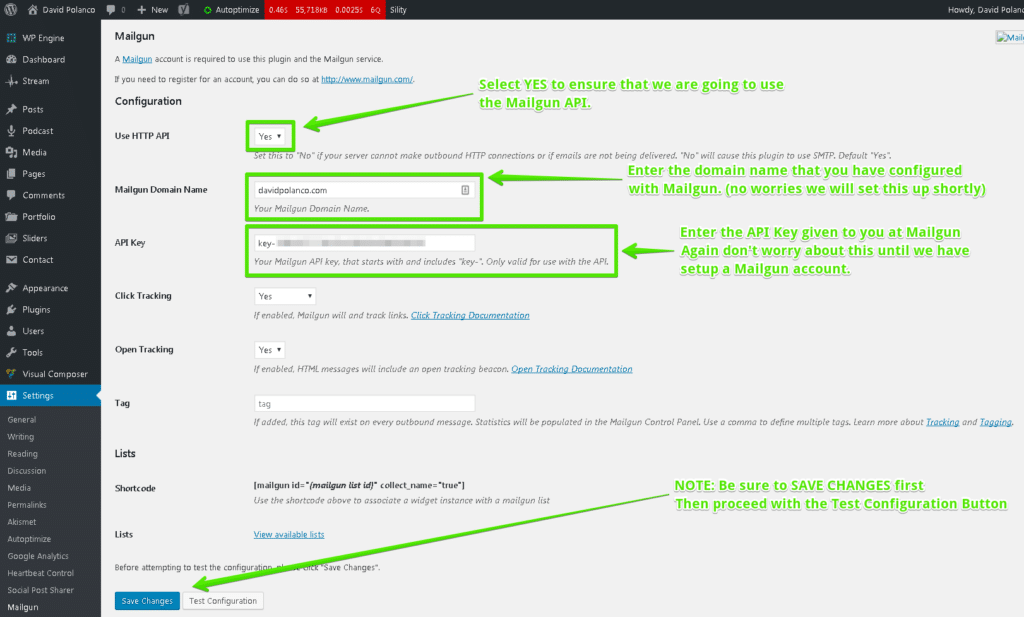
Now that you have the plugin install and activated it is now time to configure it by going to plugins > settings.
Now it is time to configure 3 areas before saving and then testing your changes. First you will need to select Use HTTP API, next enter the domain name (your domain name) in this field, finally enter the API given to you on the Mailgun Dashboard. Be sure to reference this image with the illustration below.
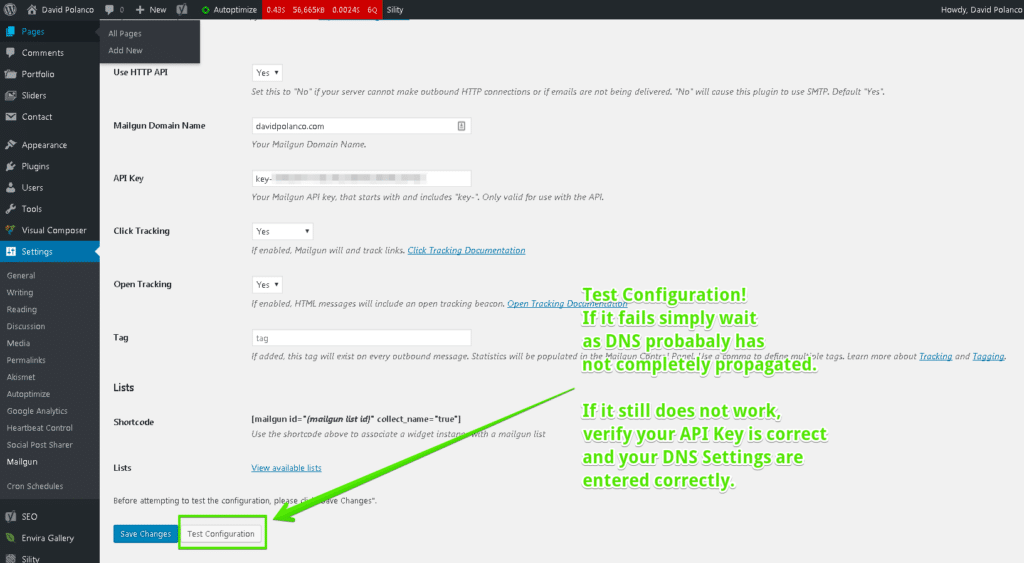
Once you have verified all your settings, and you are comfortable that enough propagation has occurred than it’s time to test your configuration.
To test to ensure that validation is done, you should receive an email that states:
This is a test email generated by the Mailgun WordPress plugin. If you have received this message, the requested test has succeeded. The method used to send this email was: HTTP API.
Finalization:
Now that your site has been validated utilizing the Mailgun API and you have ALL check marks validating your DNS inside of Mailgun from hitting the Check DNS Records Now. Go and get your favorite contact form plugin from the WordPress Plugin Directory. On my site I use Contact Form 7 to manage my contact form as it is easy and does everything that I need it to do. (plus there is no configuration needed) Once the plugin is installed WordPress should immediately begin utilizing the Mailgun API and sending out your emails securely, and efficiently. If you have any questions do not hesitate to leave a comment below or contact me on my form.
Thank you:
Many thanks to the WordPress Platform, WP Engine®, and Mailgun a © 2016 Rackspace US, Inc. Company.
Leave A Comment