
This entry explains how to change your WordPress Database Prefix for your WordPress site. I will not get into the positives or negatives from a security standpoint put personally this is something that perhaps you should consider. Before getting started be sure to make a backup of your database though this modification to the database tables can be reversed you will certainly want to do this anyways.
Getting started:
- Log in to PHPmyAdmin
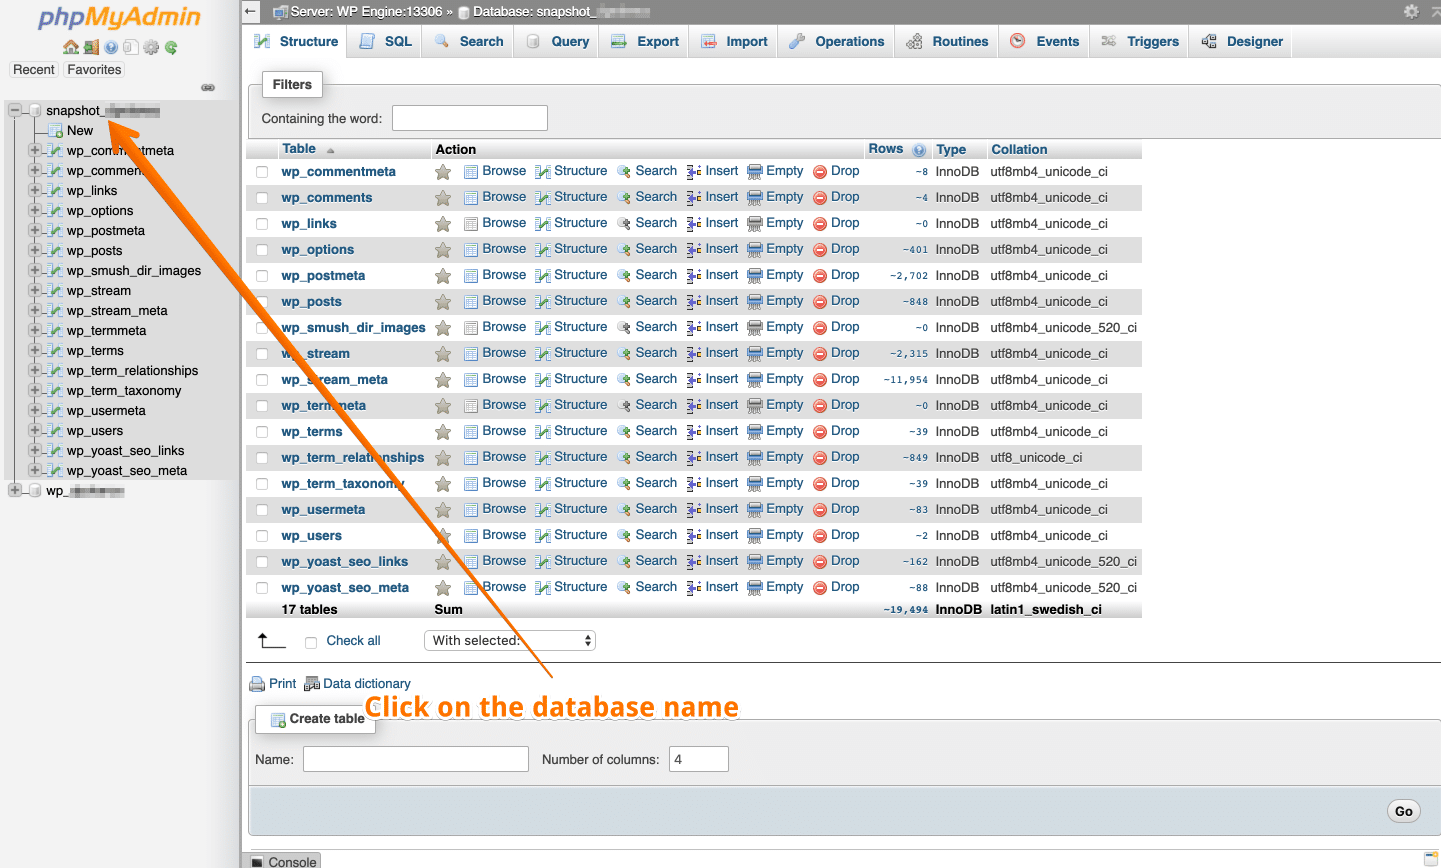
- Once logged in go to the database you wish to modify and click on the database name as shown below:
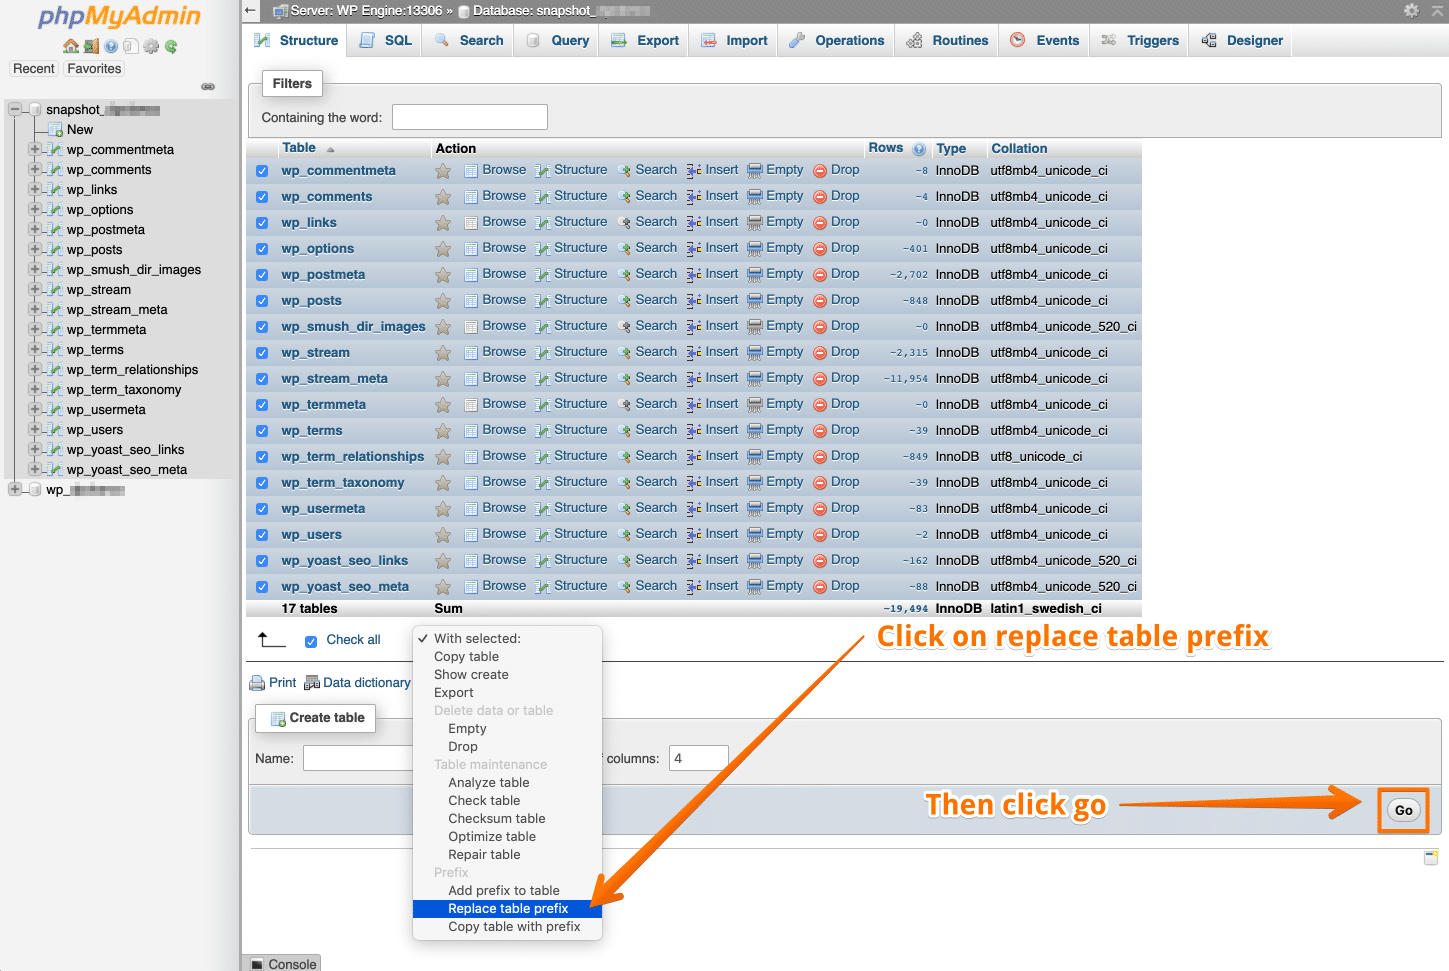
3. When this is done check mark all the database tables to select all of them:

4. Now to the right of this select box you will see (With Selected) Click that drop down menu and select (Replace Table Prefix) then click Go.
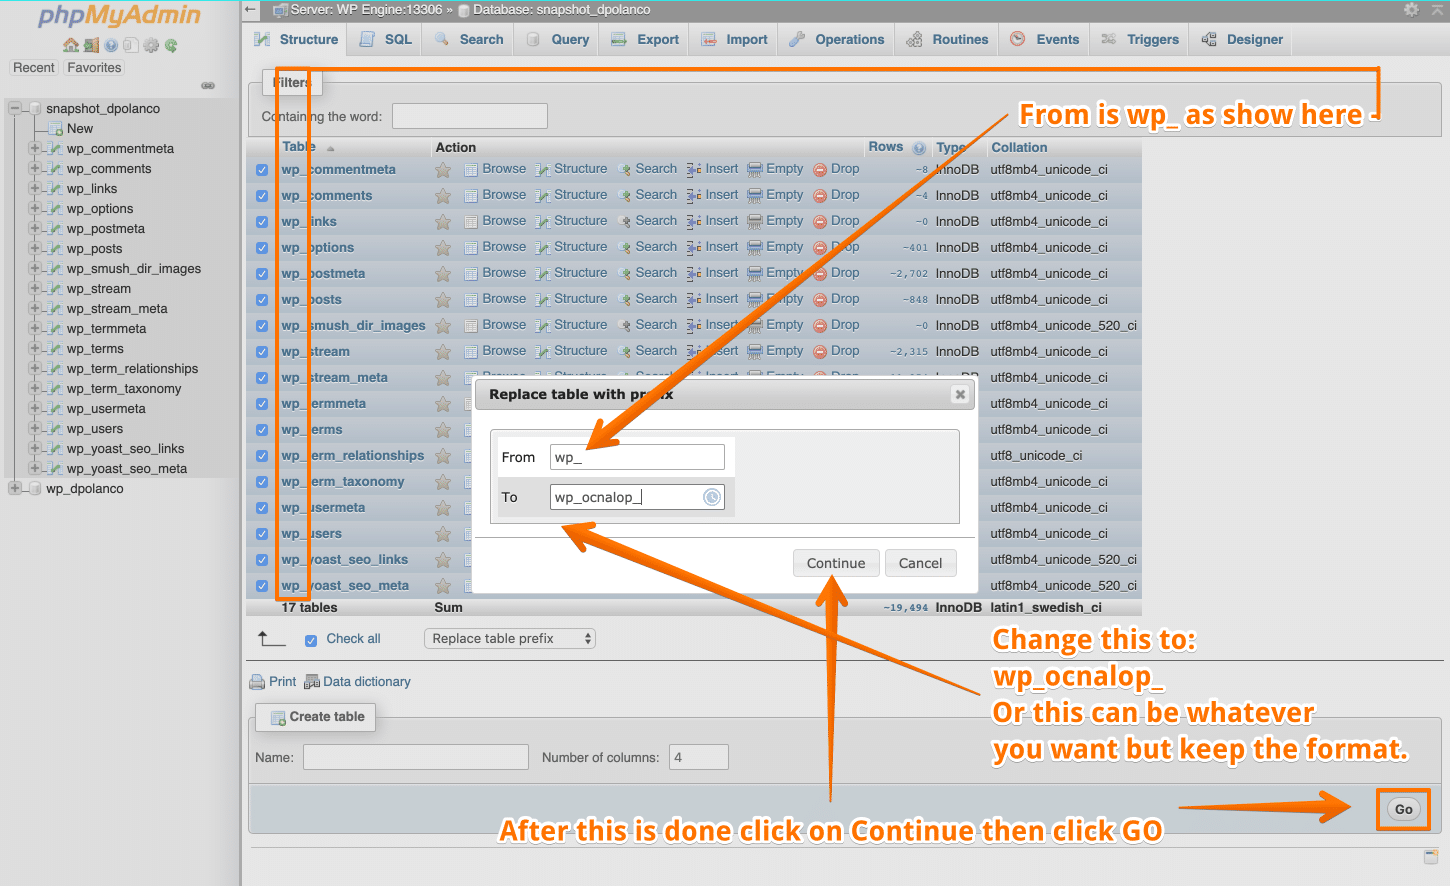
5. You should now be prompted with a box that asks for you to Replace table with Prefix. My database tables are default to wp_ however I would like to change this to: wp_ocnalop_ After this click on Continue. Then click on Go.
6. Almost done, your change in PHPmyAdmin should look similar to mine below:

7. Almost done, we need to now modify wp-config.php on the WordPress File System and change our table_prefix from wp_ to wp_ocnalop_ you will need access to FTP or ideally SFTP to do this. CPANEL, or your web hosts admin panel.
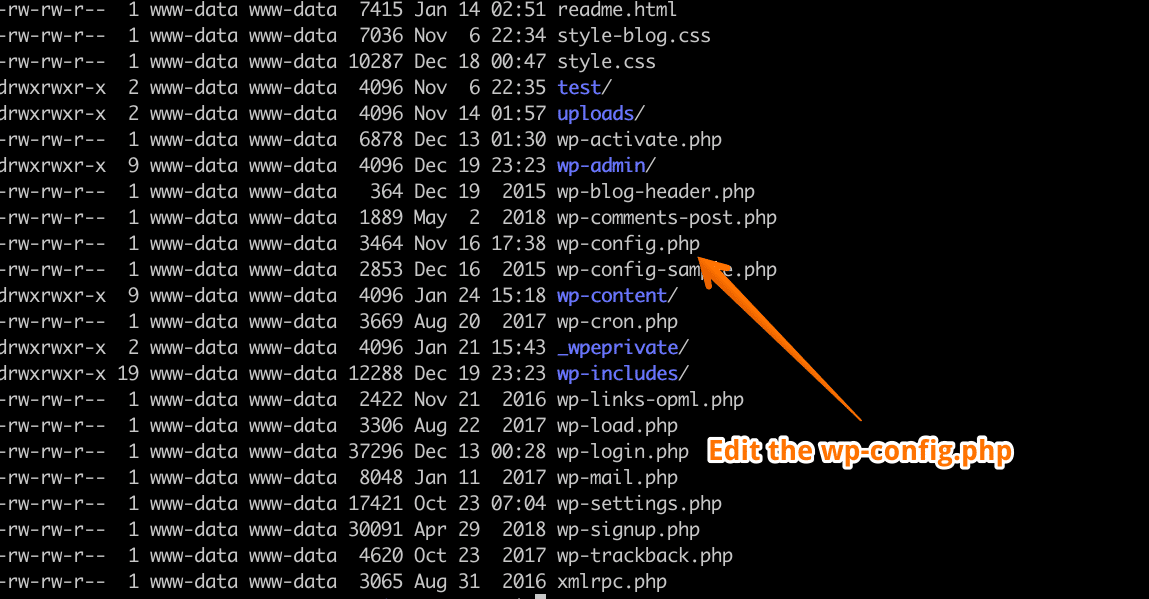
8. Now in the wp-config.php file find:
$table_prefix = 'wp_';
9. Then change this to:
$table_prefix = 'wp_ocnalop_';
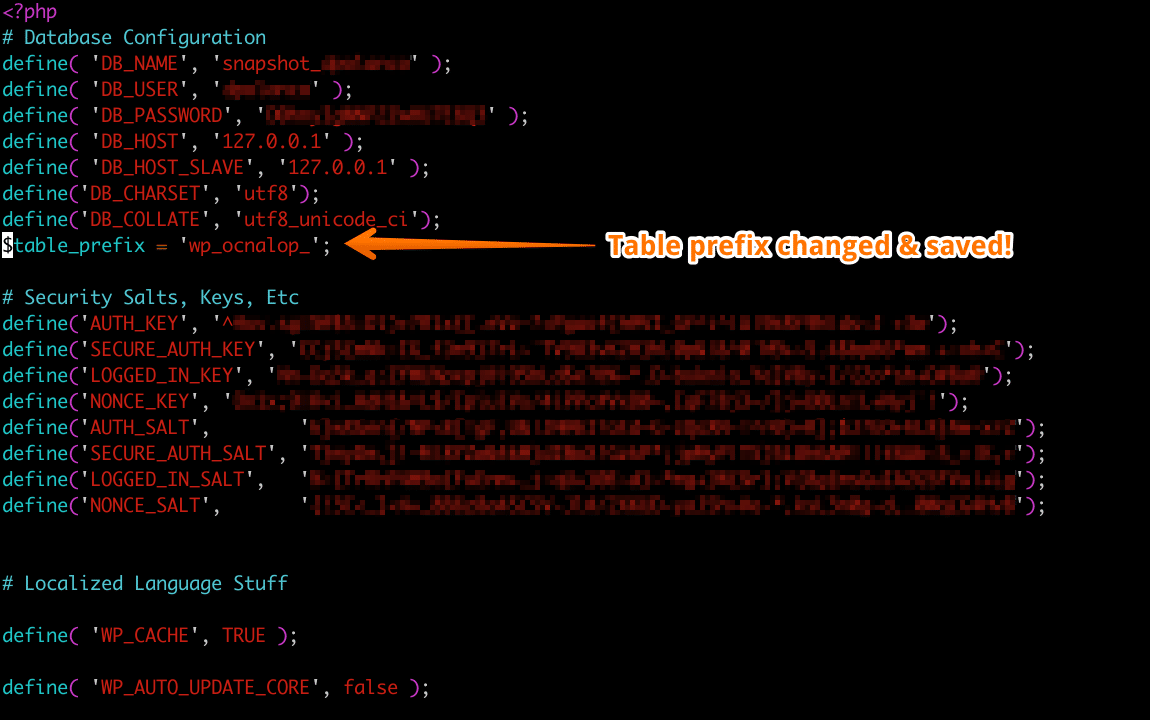
10. Your table prefix change should now look like this after you save the file:
You’re done! Pat yourself on the back! Those were a few more steps than my usual entries but you did it! If you have any questions I will be happy to answer them in the comments below. Thanks for reading and don’t forget to subscribe to my newsletter for updates just like these. 🙂
Leave A Comment